

I recently changed out the base cabinets of my office from IKEA Malms to new IKEA kitchen Sektion cabinets. They are much deeper and offer a ton of flexibility with organization. (I can do an entire post on them!) I also added a few homemade whiteboards using simple stock moulding for frames.

Everything is very basic and flat, so I spun on some ideas to hack them into something a bit more fabulous. I have long loved the look of faux bamboo on furniture, so I did a bit of research and found a few sites that sell the actual moulding like this site here. It comes in 34" lengths and runs about $8.50 or $12.50 per piece for the 3/4" and 1 1/8" respectively. I needed over 60 feet for my project and many were lengths much larger than 34". I decided to figure out how to make it myself- and I did it for under $30 for the entire project! It was a bit of trial and error, but I think I got it down for you. It also goes pretty quickly in the "making" department. I made the moulding for the above cabinet in under 30 minutes, the more you do the faster you get. The remaining workload... the painting, cutting and applying... are all things you'd have to do with the store bought variety.
You will need:
-half round molding (Any size/ length you desire... price shop if you can. I saved $0.49 per foot by checking around with different lumber yards- that adds up quick!)
-wood putty (I liked Zar's- see pic below)
-stiff piece of plastic- I used an old rewards card from my wallet
-scissors
-small brush
-bowl of water
-extra fine sandpaper
-saw to cut the moulding ( I recommend doing all your cuts before starting the tutorial. The small bumps can throw off your 45 degree cuts.)
First off lets talk about wood putty... I found this one by Zar to work great.
I has a good consistency, not too stiff and not too runny.
I has a good consistency, not too stiff and not too runny.

I did try some tubes with epic failure.
It fell right off because there isn't enough pressure applied to get it to bond and this putty was very dry and gritty..
It's a big NO.

I did consider putting the Zar putty into a cake decorating tube, but you really need to make sure the putty is sticking to the wood. The only sure way is by rubbing or wiping it on to the wood by hand.
1) Begin by gathering all your moulding and making all cuts. It's so much easier to do this before the bamboo relief is on! Be sure to mark the backsides if necessary so you know how to reassemble.
Next want to mark where you want to
"add" bamboo. I did mine every 5 inches because of drawer heights, but this is totally up to you.


2) Make a template. Find an old credit or a store rewards card and cut two notches out.
These are going to make your bamboo lines...

3) Smear the putty onto the wood moulding by using your finger or a butter knife...
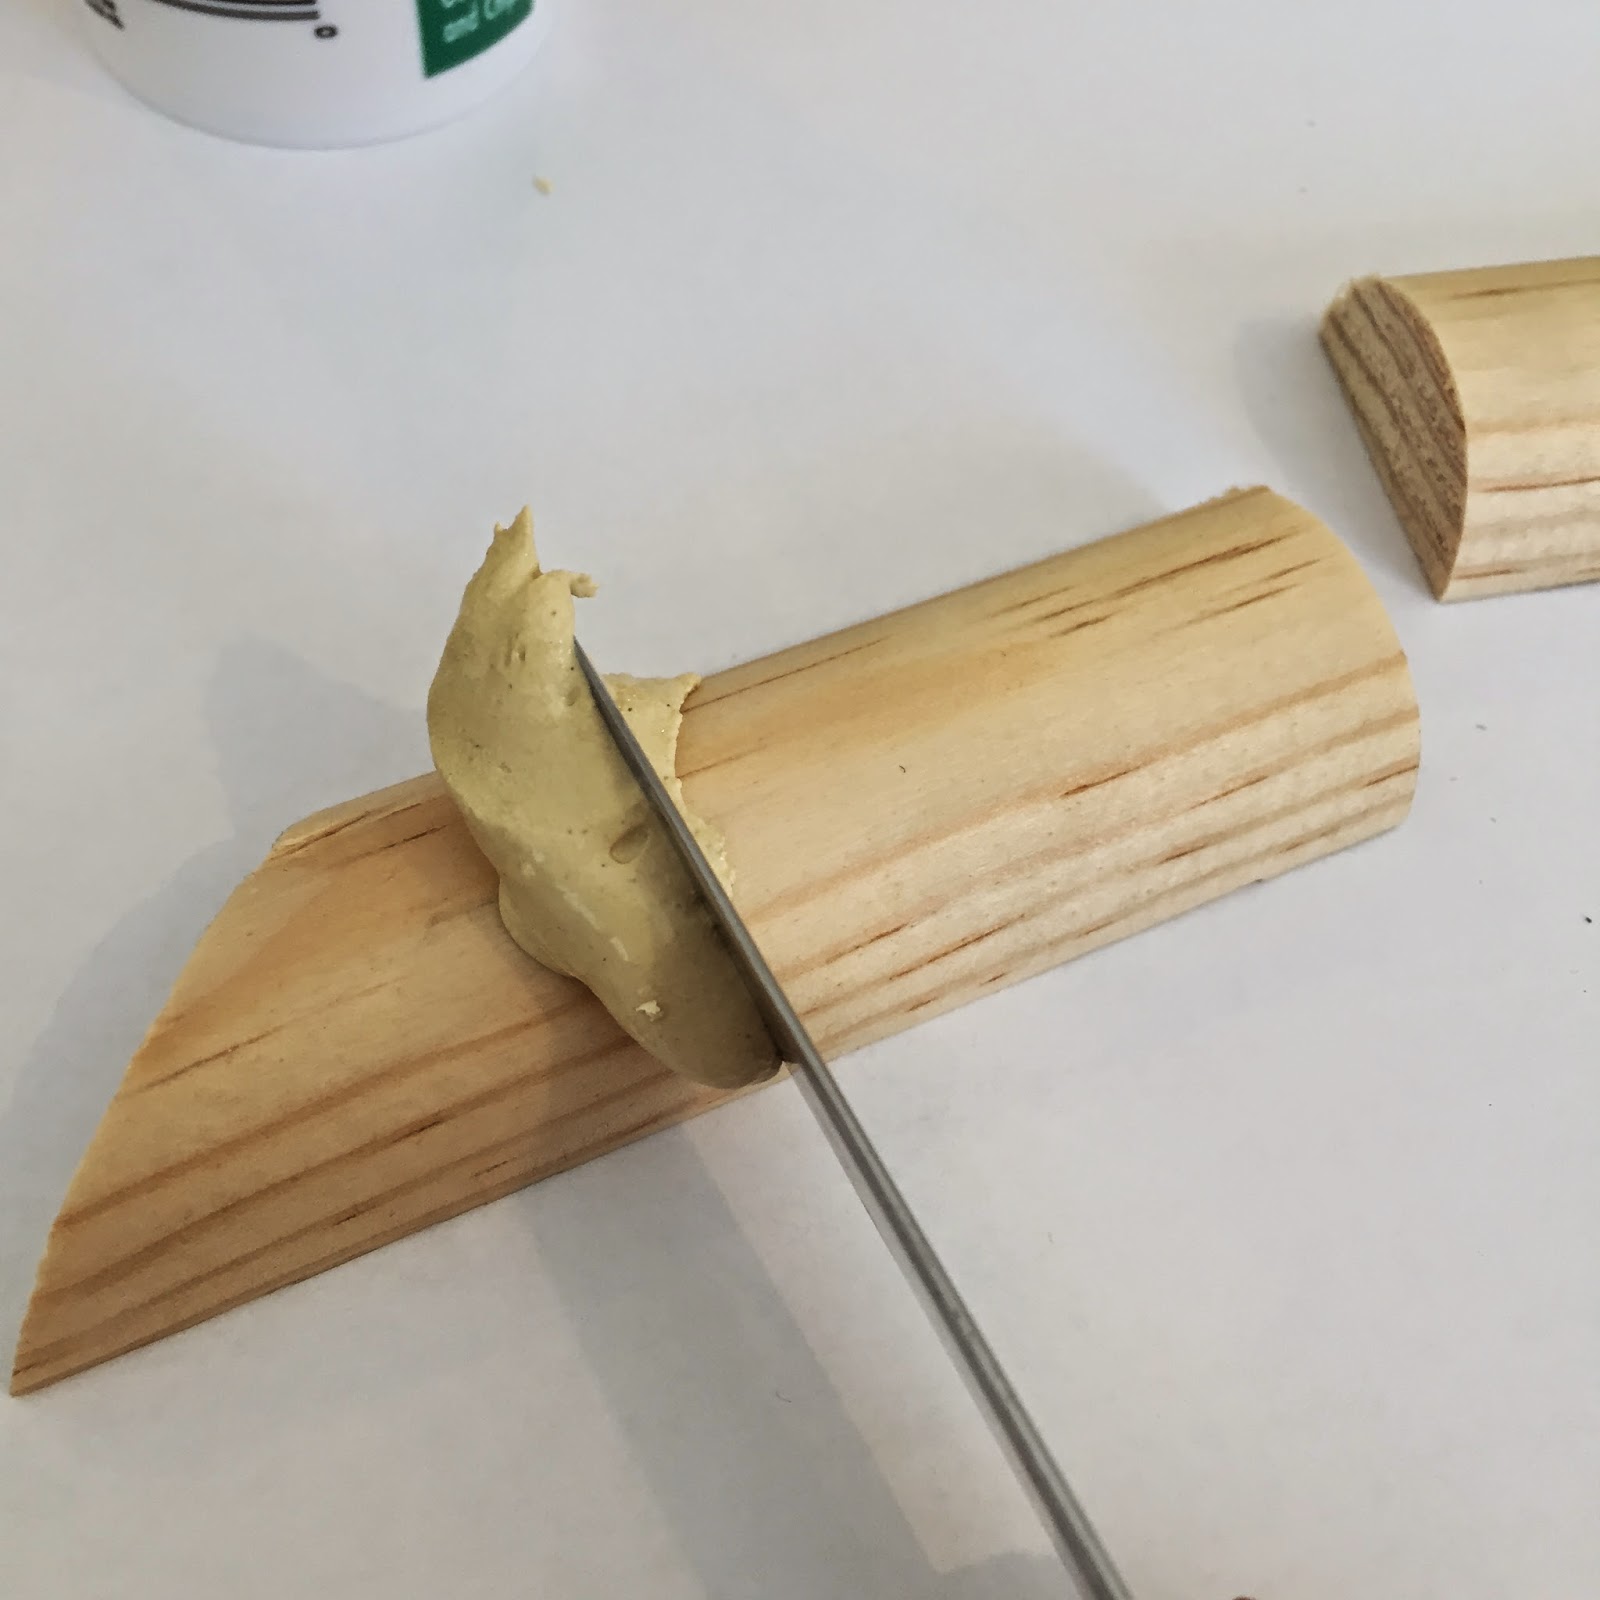
It should look something like this:

When you start, only do one or two at a time since the putty dries quickly. Once you master the technique you can do as many as you feel comfortable doing.
If you find the putty getting too stiff or dry before you are able to manipulate it, try misting it with a little water. You will also want to keep the lid of your container of putty closed when not in use.
4) Swipe that card! Starting from one side press the plastic card into the wood and drag it over to the other side creating two channels. I liked to swipe towards me when working. You can try angling the card down when you get toward the end, and be sure to go slowly.
Wipe the excess off the card.
Wipe the excess off the card.

You should now have something like this:

If you totally blow it the first few times don't give up. Just wipe it off and try again. It takes a bit of practice. If you finding that you are missing the tops or getting random bumps try cutting the template a little smaller or try adding more putty.
5) Now get your water and brush. Its time to clean up...

Dip your brush in the water and run it along the edges and down the center. This also helps create a nice smooth bond to the wood.

You can also wipe off excess and shape the edges with the brush. Don't go too crazy.
You can sand off small bumps and excess when it dries.
You can sand off small bumps and excess when it dries.

6) Now let it dry for a few hours. It will get very hard and should bond to the wood since the putty is made from pulverized wood and glue. I was afraid this might chip, but I dropped a few pieces and they held up fine!

I made a cabinet's worth of 1 1/8" moulding as well as several strips of the 3/4" moulding (painted white below)...

7) Once it is dry lightly sand with a fine grit sand paper (180-220 grit is good). Be sure to sand the back sides too if any putty got on them. (I used a 100 grit for areas that had a lot of excess.)
You can prime and paint them, and then apply them to your project.


I will be adding the 3/4" strips around all four of my white boards to dress them up:

And the 1 1/8" strips are going around the two base cabinets at my desk.
I used a nail gun to apply, but you can also use a strong adhesive glue.

Be sure to putty the seams and nail holes, sand and touch up the paint.

Add your hardware and your done.

This can be used on picture frames, mirror, table edges, doors, walls...
the applications are endless!
I will be bambooing the crap out of my office over the next week and I'll be sure to post better "daytime" photos. (sorry for the sucky night ones)
Happy bambooing!

14 comments:
I read a LOT of blogs, too many, probably. But this bamboo thang is about the most clever thing I've seen! You go, girl!
Thank you so much for this awesome tutorial! It's so simple yet gives a fantastic look!
genius.
This is genius! I am going to pin this to try it :)
Oh my goodness, you're an absolute genius! This is incredible!
You are brilliant!! I am so doing this!1 I am always searching for faux bamboo furniture to redo but this opens up a whole new world!! I have priced the moulding before but never thought of doing it myself!!!! I cannot wait to do this!!
Brilliant, absolutely brilliant! Thank you for sharing the how to.
You are so creative and smart! I'm in awe. Pinning now. Great idea!!
You are simply BRILLIANT! Your creativity and the way your mind works to come up with ideas like this amazes me. I thought your DIY Mercury Glass contact paper was genius, and here you go again with another epic idea. I can't wait to see the finished product when you're done "bambooing the crap" out of your office LOL! :D
I concur.....brilliant. I thought I was smart when I got a picture framer to put mouldings on my TV cupboard. However, this is genius & I will try this next time.
this is what I needed.. thank you for the guide
Click here for Injury Lawyers San Antonio
Brilliant idea! I fixated on how to diy faux bamboo for a long time. Have you ever tried using a hot glue gun to replicate the bamboo "knuckles"? If you mess up just peel it off then spray paint with a combo paint/primer.
Mind blown. Love it almost as much as the butcher paper faux wood floor strips. Only I'm actually doing this one;)
Thank you so much for sharing this idea. I have a whole collection of prints I wanted to frame in bamboo without breaking the bank. This is definitely worth a try!!!
Post a Comment