...I painted my Formica kitchen countertops to look like marble.
I have received a lot of questions about how it was holding up over the past year so I decided to show you (and also I realized how many changes my kitchen has undergone!)
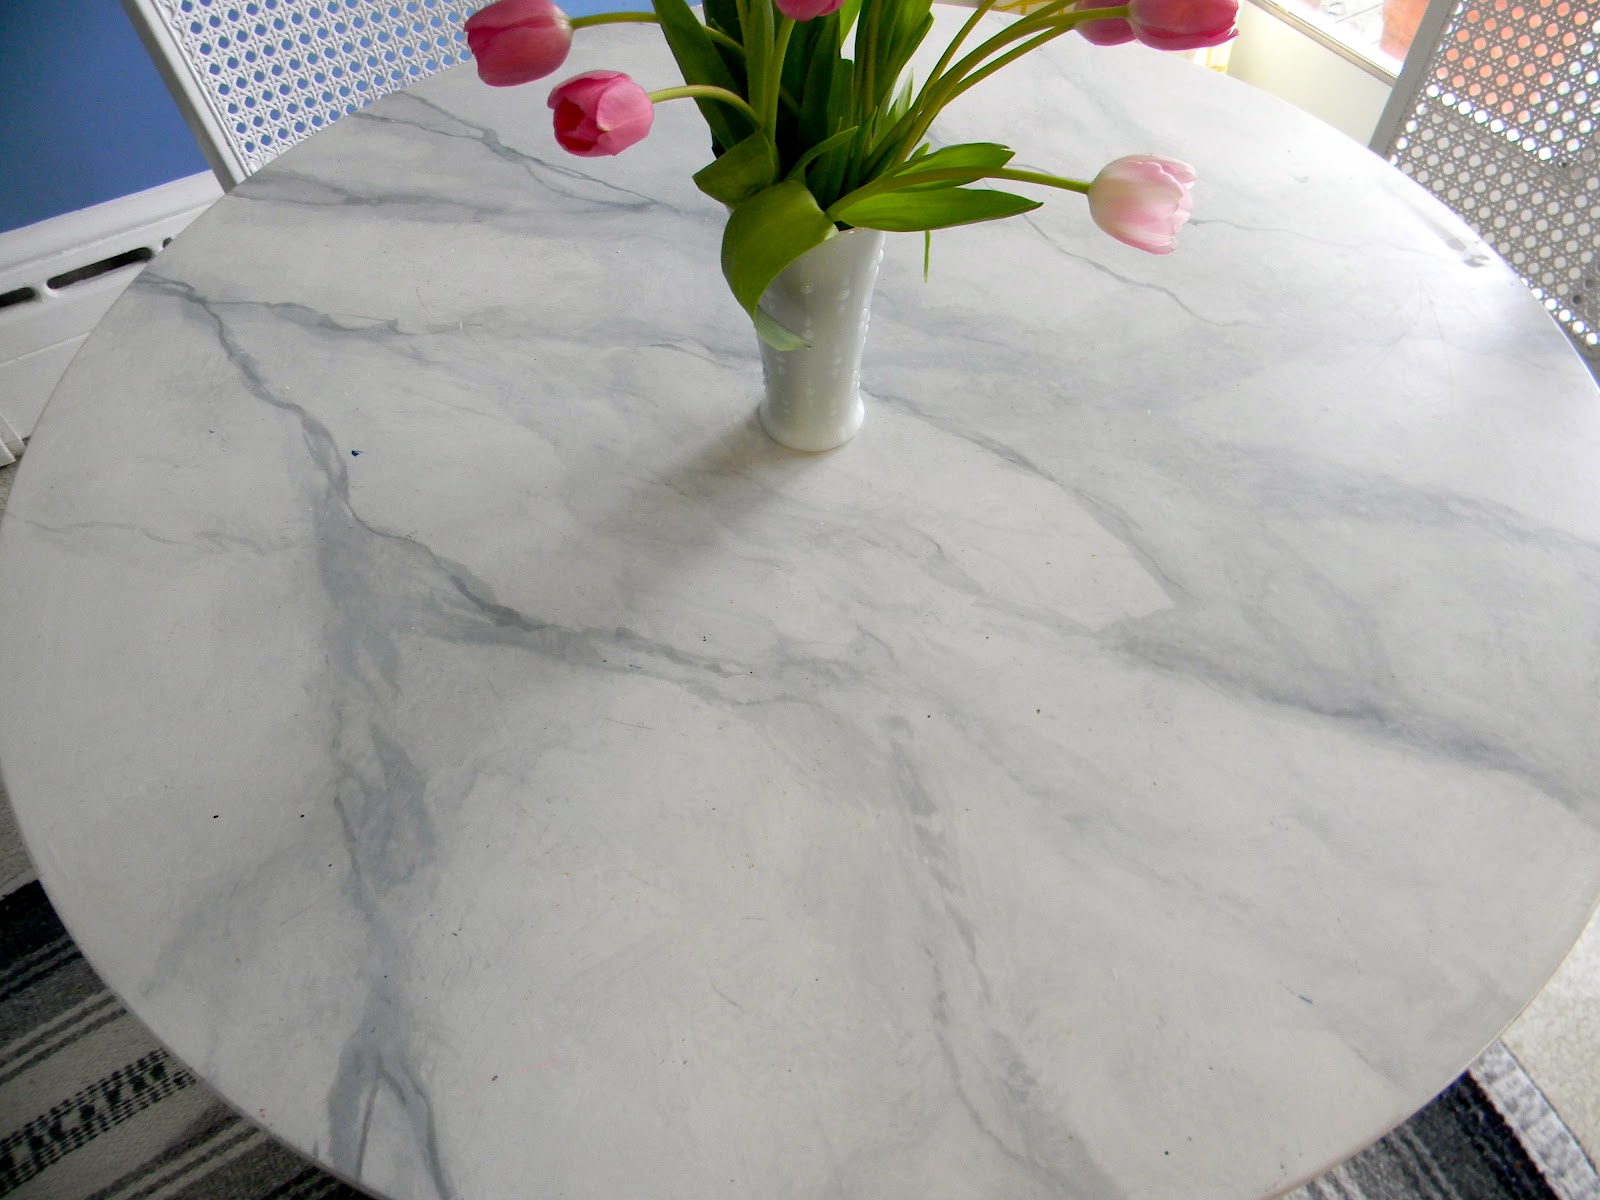
Here is my Ikea Docksta table I also painted today.
This surface has the most wear since it used for homework and eating. There are a few permanent marker spots I can't remove, but I figure I can paint them out...
Here is was a year ago...
The counters one year ago...
And today...
Upclose now...
I do have a few mystery marks I can't remove. A Mr. Clean Magic Eraser takes off most marks and stains though. For those that are stubborn I will eventually paint them and add a fresh coat of polyurethane to the entire counter. That is the secret to keeping them looking new.
What I found entertaining was all the changes.
Yes. It is a well known fact I like to change things up and I might be
crazy when it comes to all things decorative.
To me paint is like underwear and I change mine often.
I was one of those kids that rearranged their room monthly, so this has been going on for a long time and I don't see it ending soon. I also get bored easily and am way too visually stimulated.
In one year the kitchen had:
4 wall colors (turquoise, white, pink, and blue)
3 light fixtures
2 tables
2 types of chairs
2 different curtain panels
and we replaced the dishwasher, refrigerator and faucet.
Phew!
(the pink, orange and purple kitchen)
(the "pink for a day- then the men in my life had to have opinions" kitchen)
And the present kitchen. Got my pink in little punches.
The only remaining original appliance is the Brady Bunch ovens.
The top one broke, so they too will be leaving soon.
(Update: Video "How To" is at the end of this post.)
Hello my lovelies! Its cocktail time!
Today we will be drinking Blood Orange Cosmos thanks to my dear friend Nancy Stanley. She is an amazing photographer (and one of my sponsors so check her out!) and she just returned from a week in Vegas. While there she drank these at the Cosmopolitan Hotel and loves them so much she is planning an entire party around the drink. I love her!
So here are the ingredients...
Hanger One Mandarin Vodka
Salerno Blood Orange Liquor
White Cranberry Juice
Splash of simple syrup
shake with ice and serve
Now to get down to business. We will be "fauxing" Carerra marble on an IKEA Docksta table to make it look more like a marble top Saarinen table. I have been marbleizing my Formica counters all week and thought the Docksta would be a good size for a quick project.
Here is a peek at Phase One of the Cheapest Kitchen Renovation ever... ignore my pot of chicken soup please...
Here is the before (and yes that is my bottle of saving grace sitting on counter, LONG week)...
So to do this technique you will need the following materials...
-First make sure the surface is lightly sanded and primed. I used XIM bonder primer- 2 coats.
-Next mix your medium gray glaze that you will use for the veins.
I used 2 parts white primer or flat white paint, 1 part Open Time (or latex glaze) and a few drops of black. I also added just a drop of cobalt blue tint to keep it a cool gray.
-Sip. Believe it or not the alcohol helps you relax and loosen up. You want a relaxed soft hand. You don't want heavy lightening bolt veins.
-In a larger container mix your white glaze...2 parts white with one part Open Time or latex glaze.
Get your brushes, a damp sea sponge, and glazes ready. You can focus on a small area or the entire surface, just be prepared to move quickly.
Have pictures or actual samples of marble around for reference. You will notice that the veining runs the gamut from heavy to almost non-existent. Figure out what you like and aim to replicate that.
-Start by first sponging the area with white glaze, and then start filling in the ground with a large gray drift. This is going to be softened and will fade out, so don't worry about it seeming too dark. Lightly sponge areas to soften and then use your feathering brush to lightly fade the edges. Brush back and forth using an X or figure 8 motion.
Continue to soften and add more gray veins along the edges of this "cloud".
The goal is to build layers and depth. Sponge a layer of white glaze over the entire surface and then feather it with your brush. Step back and look at the area. If you want it darker do the previous steps again. Next you will start to add more specific sharper veins.
You can use either a feather or a piece of thin cardboard torn in the shape of one like I did below. You will now lay in your main veins. Dip it into your gray glazed and with a gentle hand drag and roll it down.
You don't want to make straight lines. You want to make them run on 45 degree angles and avoid making "X"s Practice this technique on cardboard a few times until you are comfortable. Gently feather the veins to soften them.
Next use a smaller brush to create the finer veins. Hold the brush like a conductor and gently roll and pull...
You can come back down again and connect areas to give it a fractured look...
Again, feather these veins. if any seem too dark soften them by sponging over with white and feathering.
Take another break and come back and decide where you are at.
Do you want more veining? Too Soft/ Heavy?
Add or adjust to your liking. You can spend hours playing around, but I recommend stepping away and getting fresh eyes. For example I ended with this...
But went back and added more gray drifts and veins to get this look...
When you are happy and it is dry, clear coat it with an acrylic polyurethane. (Avoid oil-based, it will yellow it.) 2-3 coats is recommended.
I will try to get a video up soon. It is much easier to show technique that way.
If you have any questions or need me to be more specific please ask. (I feel like there is no way I got all my info in that was on the video.) Happy Weekend and Cheers!
Update & Close Ups:
Hi everyone and thank you Apartment Therapy for posting this! I just wanted to post some close up shots for you guys. Its been almost 3 months since I painted and everything is holding great. I just don't over use Mr.Clean's magic eraser anymore. Its is great to get out stains, but rubbing too much dulls some of the polyurethane's sheen. No biggy, just recoat.
Here are the requested close ups. I had to use a flash because I'm losing daylight here, but it actually lets you see the subtle "paint" texture. You can't see this at all in regular light, actually looks very smooth but its good to see the extreme...
I have fooled a lot of people with these counters. Its not until I point it out that they realize its paint. It doesn't have the cool touch of marble obviously, and if you study it you will notice its painted, but it gives the overall illusion and look of marble... and not in a "marblized laminate" sort of way.
I actually have a paint splotch that I didn't notice until I was polyurethaning, but I use it to show people its paint. Its near the corner, and I posted a close up farther down...
Adding layers gives it depth and feathering and softening the veins is key to giving it a soft fogged feel. It just takes practice. I learned this technique in a weekend and have practiced it for years, but have taught several people who have tackled this like pros. Practice, Practice, Practice.
And here is the "oops" paint splotch...
Thanks for all you sweet comments!
And feel free to email me if you have any questions.
UPDATE:
For all you laminate cabinet haters (me included) I finally painted them.
Here is the kitchen all renovated with paint (literally!) 1 1/2 years later: